Few desserts spark nostalgia quite like thick, chewy peanut butter cookie bars. One bite instantly takes you back to school cafeterias, after-school snacks, and homemade family treats that felt warm, comforting, and completely satisfying. These classic peanut butter cookie bars deliver everything you love about old-fashioned baking, but in a simple, modern format that fits perfectly into today’s busy lifestyle.
Rich peanut butter flavor, buttery softness, chewy oats, and a perfectly balanced sweetness come together in this easy dinner dessert idea that doubles as a budget-friendly meal treat. Whether you’re baking for a crowd, prepping snacks for the week, or craving an indulgent yet easy family comfort food, this recipe checks every box. Best of all, it’s made with pantry staples, requires minimal prep, and bakes beautifully in one pan making it ideal for quick weeknight recipes and beginner-friendly baking at home.
Why You’ll Love These Peanut Butter Cookie Bars
• Easy dessert recipe made in one pan with no complicated steps
• Budget-friendly meal dessert using affordable pantry ingredients
• Family-approved comfort food loved by kids and adults
• Perfect for meal prep, lunchboxes, and after-school snacks
• Soft, chewy texture with rich peanut butter flavor
• Beginner-friendly recipe with foolproof results every time
Ingredients Breakdown: Simple Pantry Staples That Shine
Unsalted Butter: Butter forms the foundation of these cookie bars, creating a rich, tender crumb. Using unsalted butter allows you to control the salt level and achieve perfectly balanced sweetness.
Granulated Sugar: White sugar adds sweetness and helps the bars spread evenly while baking, contributing to their soft interior.
Brown Sugar: Brown sugar brings moisture, chewiness, and a subtle caramel depth. It’s essential for that classic lunch-lady-style cookie bar texture.
Creamy Peanut Butter: The star ingredient. Creamy peanut butter provides bold flavor, richness, and structure. It’s one of the best budget-friendly groceries for baking and delivers unbeatable comfort food appeal.
Eggs: Eggs bind everything together and add moisture, ensuring the bars bake evenly and stay soft for days.
Vanilla Extract: Vanilla enhances the sweetness and rounds out the peanut butter flavor, making every bite taste warm and bakery-quality.
All-Purpose Flour: Flour provides structure and stability, turning the dough into thick, sliceable bars that hold their shape.
Baking Soda: Baking soda helps the bars rise slightly and keeps the texture light instead of dense.
Salt: Salt balances the sweetness and intensifies the peanut butter flavor—an essential ingredient in any successful dessert.
Quick Oats: Oats add heartiness, texture, and a subtle chew that elevates these bars from basic cookies to satisfying family comfort food.
Kitchen Equipment You’ll Need for Easy Baking
- 9×13 Inch Baking Dish: The ideal size for thick, evenly baked cookie bars that cut cleanly into generous portions.
- Mixing Bowls: One large bowl for wet ingredients and a medium bowl for dry ingredients keeps mixing easy and organized.
- Hand Mixer or Stand Mixer: Creaming the butter and sugars properly ensures a smooth, fluffy base for the dough.
- Whisk: Perfect for evenly combining dry ingredients and preventing clumps.
- Measuring Cups and Spoons: Accurate measurements are key for consistent results and perfect texture.
- Spatula: A sturdy spatula helps spread the thick dough evenly into the baking dish.
- Cooling Rack: Cooling the bars properly prevents soggy bottoms and helps them firm up before slicing.
Pro Tips for Perfect Peanut Butter Cookie Bars
- Use Room-Temperature Ingredients:Softened butter and room-temperature eggs mix more smoothly, creating a better texture and even baking.
- Don’t Overmix the Dough: Once the flour and oats are added, mix just until combined to keep the bars tender and soft.
- Line Your Baking Dish: Parchment paper makes lifting and slicing the bars effortless and prevents sticking.
- Let the Bars Cool Completely: Cooling allows the structure to set, resulting in clean slices and a chewier texture.
- Measure Flour Correctly:Too much flour can make the bars dry. Spoon and level for best results.
Ingredient Swaps and Recipe Variations
- Gluten-Free Peanut Butter Bars: Swap all-purpose flour for a 1:1 gluten-free baking blend to create gluten-free recipes without sacrificing texture.
- Lower-Sugar Option: Reduce the granulated sugar slightly and rely more on brown sugar for moisture and sweetness balance.
- Crunchy Peanut Butter Version: Use crunchy peanut butter for added texture and nutty crunch.
- Chocolate Chip Peanut Butter Bars: Stir in chocolate chips for a more indulgent dessert that doubles as easy party food ideas.
- Dairy-Free Alternative: Use plant-based butter to make this recipe suitable for dairy-free diets.
Serving Suggestions for Maximum Enjoyment
Serve these peanut butter cookie bars slightly warm for a soft, gooey bite or at room temperature for clean slices and chewy texture. They pair perfectly with:
• Cold milk or dairy-free alternatives
• Coffee or afternoon tea
• Fresh fruit for a balanced snack
• Vanilla ice cream for an easy dessert upgrade
• Packed lunches and school snacks
Make Ahead and Storage Tips for Busy Families
Make Ahead
You can prepare the dough up to 24 hours in advance and refrigerate it tightly covered. Let it sit at room temperature before baking for easier spreading.
Storage
Store baked bars in an airtight container at room temperature for up to 4 days. They stay soft and flavorful without refrigeration.
Freezing
These bars freeze exceptionally well. Wrap individual slices and freeze for up to 3 months. Perfect for meal prep ideas and healthy lunch prep.
Reheating
Warm individual bars briefly in the microwave for a freshly baked texture.
Cultural and Nostalgic Roots of Lunch Lady Cookie Bars
Peanut butter cookie bars are a staple of American comfort food, often associated with school cafeterias and traditional family meals. These desserts were designed to be affordable, filling, and easy to make in large batches qualities that still make them popular today. This modern version keeps the nostalgic flavor while improving texture and home-baking reliability.
Frequently Asked Questions About Peanut Butter Cookie Bars
Can I make these cookie bars ahead of time?
Yes, they’re perfect for meal prep recipes and taste even better the next day.
How do I store leftovers?
Keep them in an airtight container at room temperature or freeze for long-term storage.
Can I make this recipe healthier?
You can reduce sugar slightly, use natural peanut butter, or add whole-grain flour for a healthier twist.
What’s the best peanut butter to use?
Creamy peanut butter works best for texture, but crunchy can be used for added bite.
Can I double this recipe?
Absolutely. Bake in two pans for parties, events, or large families.

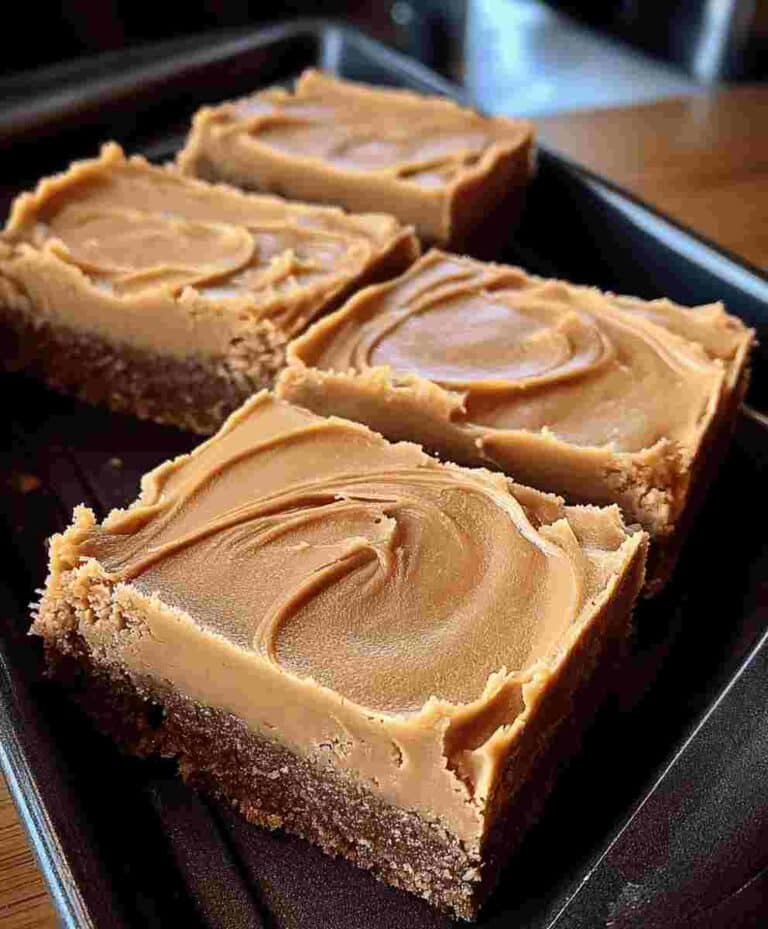
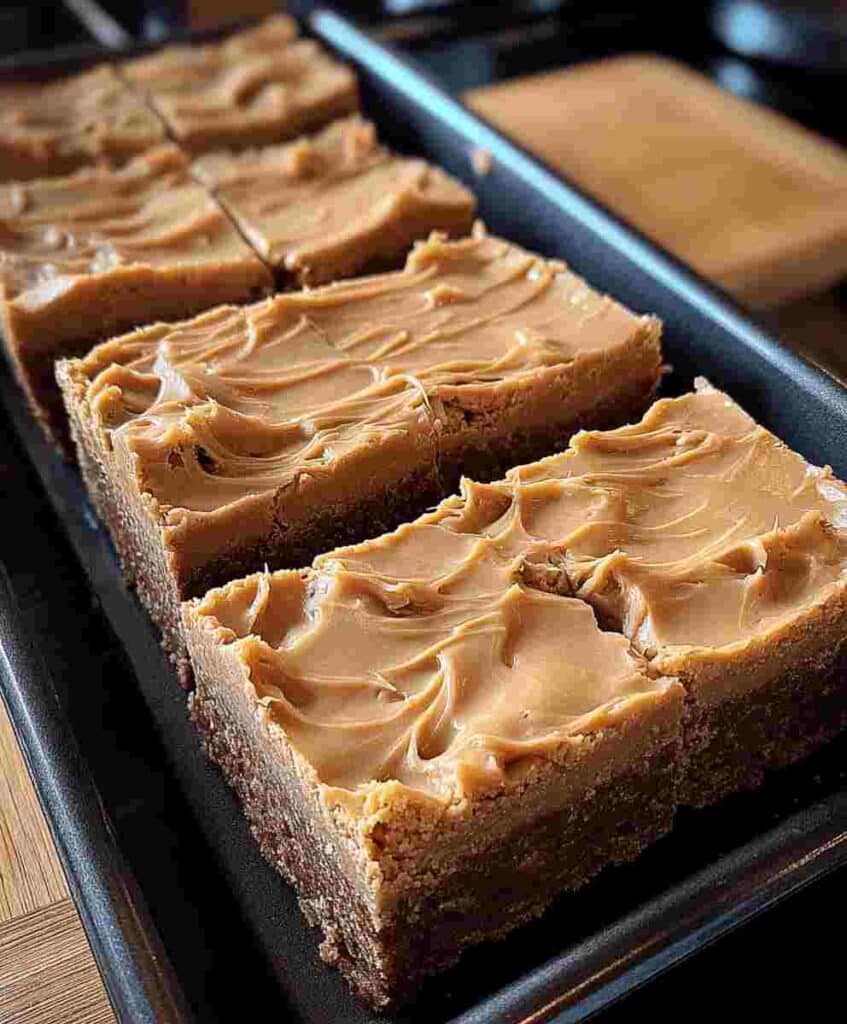
Classic Peanut Butter Lunch Lady Cookie Bars
Ingredients
Method
- Preheat the oven to 350°F (175°C). Grease or line a 9×13-inch baking dish with parchment paper.
- In a large mixing bowl, cream together the softened butter, granulated sugar, and brown sugar until light and fluffy.
- Mix in the peanut butter until smooth, then add the eggs one at a time, followed by the vanilla extract.
- In a medium bowl, whisk together the flour, baking soda, and salt. Gradually add the dry ingredients to the wet mixture until just combined.
- Fold in the quick oats using a spatula. Spread the dough evenly into the prepared baking dish.
- Bake for 22–25 minutes, or until the edges are lightly golden and the center is set.
- Allow the cookie bars to cool completely in the pan on a cooling rack before slicing into bars and serving.