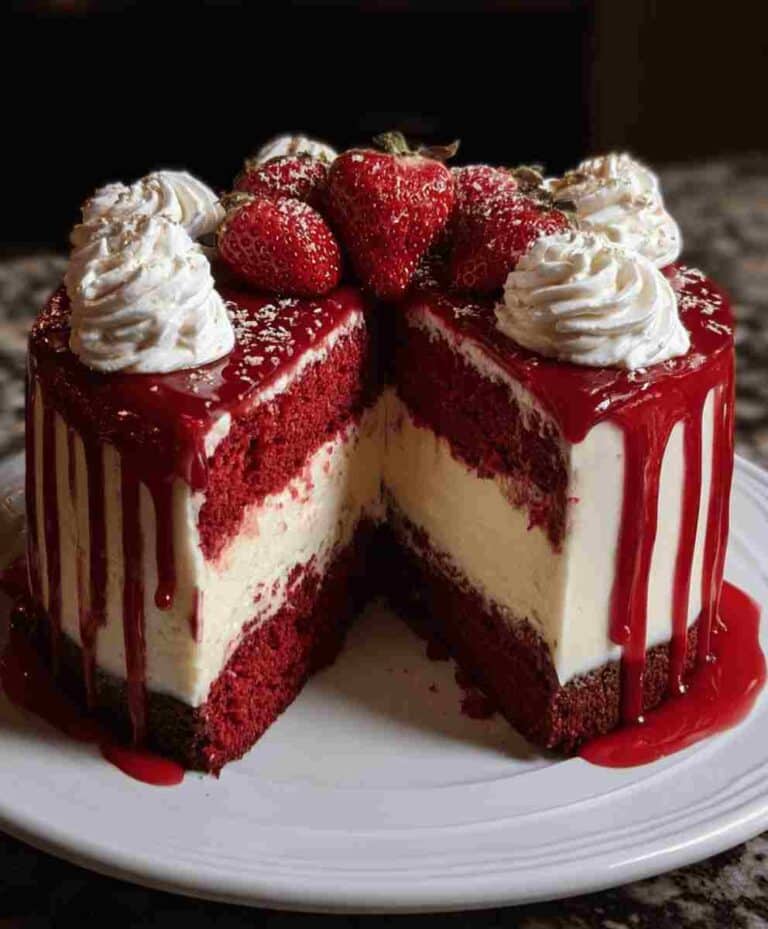
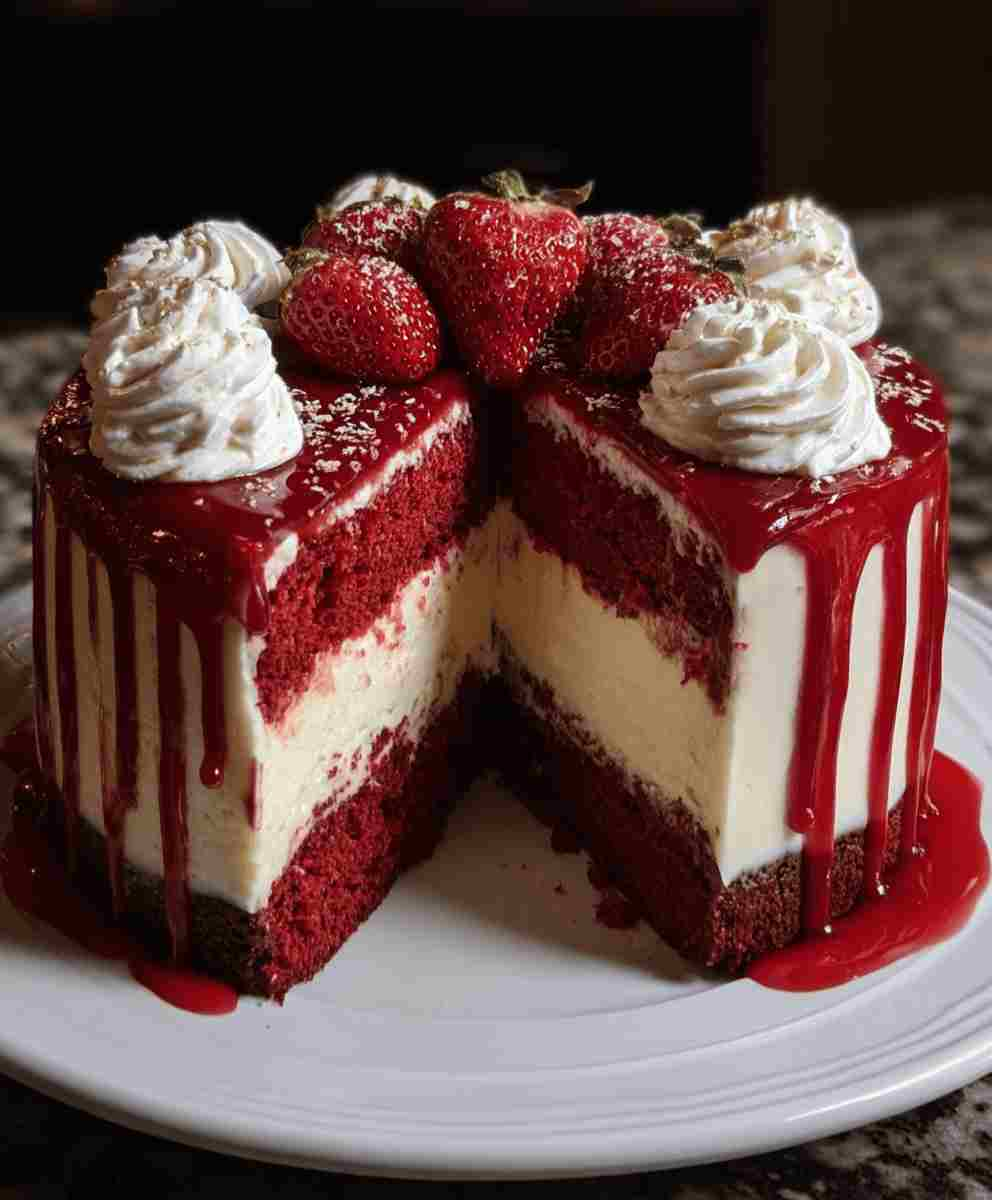
Get ready to fall in love with the ultimate dessert mash-up: the Red Velvet Cheesecake Cake. It’s indulgent, striking, and guaranteed to steal the spotlight at any gathering. Imagine two moist, vibrant red velvet cake layers sandwiching a smooth, creamy cheesecake, all covered in rich cream cheese frosting. Every bite delivers a perfect blend of tangy, sweet, and velvety textures that melt in your mouth.
This dessert looks bakery-perfect but is surprisingly easy to make at home. Whether you’re planning a Valentine’s Day dessert, Christmas showstopper, or birthday centerpiece, this recipe is made to impress without breaking your budget or your sanity. It’s the kind of special occasion cake that turns an ordinary day into something unforgettable.
The deep red hue, luxurious frosting, and creamy center make it a dessert masterpiece worthy of any celebration the perfect combination of classic Southern comfort and modern elegance.
Why You’ll Love This Recipe
- Double-layer indulgence: Combines two iconic desserts cheesecake and red velvet cake in one irresistible creation.
- Perfect for celebrations: Ideal for holidays, birthdays, weddings, or romantic dinners.
- Rich yet balanced flavor: The tangy cheesecake and frosting beautifully complement the cocoa-infused red velvet.
- Visually stunning: The red and white layers make for a picture-perfect slice every time.
- Make-ahead friendly: You can prepare the cheesecake a day in advance for stress-free baking.
- Bakery quality at home: Skip the expensive bakery order this is a budget-friendly luxury dessert.
Ingredient Breakdown
Red Velvet Cake Layers
- All-Purpose Flour (2 cups): The base structure that gives the cake its tender crumb.
- Unsweetened Cocoa Powder (½ cup): Adds a subtle chocolate flavor and deepens the iconic red hue.
- Baking Soda & Baking Powder: The perfect rise duo for fluffy yet dense layers.
- Salt (½ tsp): Balances sweetness and enhances flavor depth.
- Granulated Sugar (1 cup): Sweetens the batter while keeping the cake moist.
- Butter (½ cup, room temperature): Adds richness and creates a soft texture.
- Eggs (2 large): Provide structure and stability for perfect slicing.
- Buttermilk (1 cup): Essential for tang and tenderness the secret to a velvety crumb.
- Vanilla Extract (2 tsp): Adds warmth and enhances the cocoa flavor.
- White Vinegar (1 tsp): Reacts with the baking soda for a light, airy rise.
- Red Food Coloring (1 oz): Creates that classic, striking red color we all love.
Cheesecake Layer
- Cream Cheese (24 oz): The star of the show use full-fat for a smooth, luscious texture.
- Granulated Sugar (½ cup): Balances the tanginess of the cream cheese.
- Egg (1 large): Helps the cheesecake set while staying creamy.
- Sour Cream (½ cup): Adds richness and prevents cracks.
- Vanilla Extract (1 tsp): Enhances the cheesecake’s warm, dessert-like flavor.
Cream Cheese Frosting
- Butter (½ cup, softened): Creates a smooth, creamy frosting base.
- Cream Cheese (16 oz): Brings the signature tangy flavor and luxurious texture.
- Powdered Sugar (4 cups): Sweetens and thickens the frosting to perfection.
- Vanilla Extract (1 tsp): Rounds out the sweetness.
- Pinch of Salt: Balances the flavors beautifully.
- Heavy Cream or Milk (1–2 tbsp, optional): For a lighter, fluffier consistency.
Pro Tips for Perfect Results
- Room Temperature Ingredients: Always use room-temp butter, eggs, and cream cheese for a smoother batter and even baking.
- Chill the Cheesecake: Make the cheesecake layer the day before. Chilling it overnight makes stacking easier.
- Use Parchment Rounds: Line cake pans to prevent sticking and ensure clean removal.
- Level the Cakes: Slice off any domed tops before stacking for a perfectly even layer cake.
- Crumb Coat First: Apply a thin frosting layer before the final coat to lock in crumbs and achieve a professional finish.
Ingredient Swaps & Variations
- Chocolate Cheesecake Layer: Mix 2 tablespoons of cocoa powder into the cheesecake batter for a double-chocolate version.
- Berry Bliss: Add a layer of strawberry or raspberry jam between the cake and cheesecake for a fruity twist.
- Gluten-Free Version: Substitute all-purpose flour with a 1:1 gluten-free baking blend.
- Color Play: Swap red for pink or purple food coloring for different themed occasions.
- Cupcake Version: Make mini cheesecake cupcakes using the same batter for parties or bake sales.
Serving Suggestions
- Holiday Centerpiece: Garnish with white chocolate curls or sugared cranberries for a festive look.
- Valentine’s Day Dessert: Top with fresh strawberries or raspberries and a drizzle of chocolate syrup.
- Perfect Pairing: Serve with coffee, cappuccino, or hot cocoa for a cozy dessert experience.
- Elegant Plating: Add a dusting of cocoa powder or a dollop of whipped cream before serving.
Make Ahead + Storage Tips
- Make Ahead: The cheesecake layer can be baked up to 2 days in advance. Chill it until ready to assemble.
- Assembled Cake: Can be made a day before serving and stored in the refrigerator.
- Refrigerate: Keep covered and chilled for up to 5 days.
- Freeze: Freeze the whole cake or individual slices (wrapped tightly) for up to 2 months. Thaw overnight in the refrigerator before serving.
- Transport Tip: Chill thoroughly before moving to keep layers firm and intact.
Cultural or Historical Notes
Red velvet cake traces its origins back to the early 20th century and gained massive popularity in the American South. Its signature red hue originally came from natural cocoa and acidic ingredients like buttermilk and vinegar. Over time, food coloring turned it into the bold, vibrant dessert we know today.
Adding a cheesecake layer transforms this Southern classic into a modern showstopper a fusion of American comfort food and sophisticated patisserie-style indulgence. It’s a dessert that bridges nostalgia and elegance in one bite.
Frequently Asked Questions (FAQ)
1. Can I make this cake ahead of time?
Yes! The cheesecake can be made 1–2 days in advance, and the entire cake can be assembled the day before serving.
2. How do I prevent cracks in the cheesecake layer?
Bake it in a water bath and avoid overmixing. Let it cool slowly in the oven with the door slightly open.
3. Can I use store-bought red velvet cake mix?
Absolutely! Use two 8-inch cake layers from a boxed mix to save time.
4. What’s the best way to frost this cake?
Start with a crumb coat, chill for 15 minutes, then apply the final smooth layer for a professional finish.
5. Can I make this without food coloring?
Yes. The flavor remains the same just skip the color for a natural “velvet cheesecake cake” with a light cocoa tone.
Red Velvet Cheesecake Cake
Ingredients
Method
- Step 1: Preheat oven to 325°F (160°C). Line a 9-inch springform pan with parchment paper. Beat cream cheese and sugar until smooth, then mix in the egg, sour cream, and vanilla extract until creamy. Pour into the pan and bake for 35–40 minutes or until set. Let cool completely, then chill.
- Step 2: Preheat oven to 350°F (175°C). Grease two 9-inch round cake pans and line with parchment paper.
- Step 3: In a bowl, whisk together flour, cocoa powder, baking soda, baking powder, and salt. In another bowl, cream butter and sugar until fluffy. Beat in eggs one at a time, then mix in buttermilk, vanilla, vinegar, and red food coloring. Gradually add dry ingredients, mixing until just combined.
- Step 4: Divide batter evenly between pans and bake for 25–30 minutes, or until a toothpick comes out clean. Cool completely.
- Step 5: Level the cake layers if needed. Place one red velvet layer on a serving plate, then carefully place the chilled cheesecake on top. Add the second red velvet layer on top of the cheesecake.
- Step 6: Beat butter and cream cheese until smooth. Gradually add powdered sugar, then mix in vanilla, salt, and heavy cream if needed for a soft, spreadable texture.
- Step 7: Frost the cake with cream cheese frosting, smoothing the sides and top. Chill for at least 1 hour before slicing for clean layers. Garnish with red velvet crumbs or white chocolate curls if desired.

