Imagine slicing into a velvety cream cheese base, the rich tang of the cheesecake giving way to vibrant streaks of purple and green that swirl like magical potion ripples. This witches’ brew swirl cheesecake delivers creamy, dreamy texture and eye-catching colors that turn dessert into a party centerpiece perfect for Halloween or any fun gathering. If you’re looking for affordable meals or easy dinner ideas, or even a standout dessert that doubles as “cheesy comfort food” (well, creamy comfort food!), this is your easy go-to. With simple ingredients and uncomplicated steps, this recipe fits neatly into meal prep recipes, healthy cooking at home (yes even indulgent desserts can be smartly budget-friendly!), and quick weeknight recipes when you want to treat your crew without stressing.
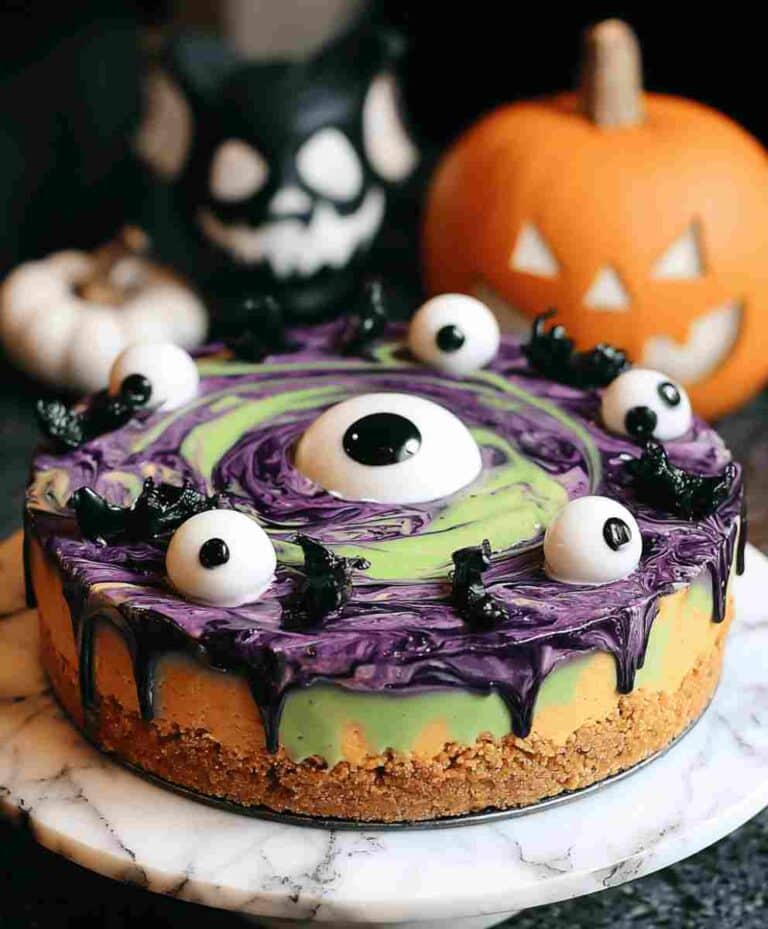
When the cheesecake emerges from the oven, its edges are set and the center still jiggles just the right amount. Later, you top it with sparkling edible glitter and candy eyeballs for that whimsical, spooky finish. Whether you serve this to a group of friends, your family, or at a party brunch it becomes that vibrant, memorable dessert everyone snaps a photo of before they dig in. Read on to see why you’ll love this recipe, the ingredient breakdown, pro tips, creative swaps, and how to make ahead & store let’s get swirling!
Why You’ll Love This Recipe
- Quick-ish prep: With about 15–20 minutes of active work (plus bake and chill time), it fits into your list of easy dinner for beginners or dessert recipes when time is tight.
- Budget-friendly ingredients: Simple staples like graham cracker crumbs, cream cheese and food coloring make this a budget-friendly recipe rather than an exotic splurge.
- Family-approved comfort food: The creamy texture, gentle sweetness and fun colors make it a hit with kids and adults alike ideal for simple family recipes or celebrations.
- Visual wow factor: The purple and green swirl gives it party-ready appeal, making it a standout in your easy party food ideas arsenal.
- Meal-prep friendly: Bake it ahead, refrigerate for at least 4 hours (or overnight) and you’ll have a ready-to-serve treat that fits into your meal prep ideas or leftover recipe hacks (if there are leftovers!).
- Beginner-friendly: No fancy pastry skills required just basic mixing, coloring and a gentle swirl with a toothpick. Great for easy cooking tips for home cooks wanting fun results.
Ingredient Breakdown
- 1 ½ cups graham cracker crumbs – This forms the base crust. The cracker crumbs provide structure and that familiar slightly sweet crunch, making it one of the budget-friendly groceries staples for desserts.
- ¼ cup melted butter – Acts as the binder for the crust, solidifying when chilled so your cheesecake has a sturdy foundation.
- 24 oz cream cheese, softened – The star of the show. The cream cheese yields the rich, creamy texture that defines a great cheesecake. It’s the “cheesy comfort food” element (in dessert form!).
- 1 cup sugar – Sweetens the base mixture. Keeps things simple and balances the tang of the cream cheese.
- 3 large eggs – They help bind the batter and give the cheesecake its firm-but-smooth structure when baked.
- 1 tsp vanilla extract – A classic flavour enhancer. Elevates the taste from plain cream cheese to something more dessert-worthy.
- Purple food coloring & green food coloring – These make the visual magic happen! They allow you to create the swirl effect and give that “witches’ brew” aesthetic perfect for easy dessert ideas that stand out.
- Edible glitter and candy eyeballs (for decoration) – These finishing touches turn your cheesecake into a themed masterpiece. They aren’t essential for flavour but add the visual wow-factor and make it memorable for parties or holiday gatherings.

Pro Tips
- Always pre-heat your oven to the correct temperature (325°F / 160°C) so your cheesecake bakes evenly from the start. Uneven baking often leads to cracks or uneven texture.
- Don’t overmix your cream cheese batter – Beat the softened cream cheese, sugar, vanilla and eggs only until smooth. Over-beating can introduce too much air and make the cheesecake crack or rise and fall.
- Divide and colour the batter just before swirling – After mixing the full batter, separate into two bowls and colour one purple, one green. Then alternate dollops in the pan and swirl gently with a toothpick. Doing this just before baking helps maintain the colour contrast and swirl pattern.
- Check doneness carefully – Bake for 50-55 minutes until the edges are set and the centre still jiggles slightly. If you wait until the centre is fully firm, you risk over-baking and losing that creamy, smooth cheesecake texture.
- Cool completely before refrigerating – Let the cheesecake sit at room temperature until fully cooled, then refrigerate for at least 4 hours (overnight is even better). Proper chilling helps it set fully and makes slicing cleaner.
- Use a warm knife for clean slices – Dip your knife in hot water, wipe it dry and slice this helps you get smooth, clean slices through the colourful swirls without dragging crumbs or cracking the surface.
Ingredient Swaps or Variations
- Gluten-free crust option: Swap the graham cracker crumbs with a gluten-free biscuit or gluten-free graham equivalent to make this a gluten-free dessert idea.
- Low-carb / keto-friendly version: Use a crushed almond-flour & butter crust, switch sugar for erythritol or another keto-safe sweetener, and use full-fat cream cheese. You’ll have a low-carb dessert variation that holds the same visual appeal.
- Dairy-free or vegan twist: Use vegan cream cheese, a flax “egg” substitute (for each egg use 1 Tbsp flaxseed meal + 3 Tbsp water), and a plant-based butter for the crust. Use vegan sugar to keep it clean. This becomes a healthy recipe alternative for dietary preferences.
- Different colour themes: Instead of purple and green, pick other colour combos: orange & black for a classic Halloween palette, or pink & teal for a birthday party spin. This helps if you tailor to specific events and your “party food” ideas change.
- Additional flavours: Mix in citrus zest (lemon or lime) into the batter for a tangy twist, or swirl in chocolate ganache or raspberry coulis for more depth. You’ll have budget-friendly substitutions that elevate the flavour without complicating the process.
Serving Suggestions
- Slice the cheesecake into wedges and place each slice on a clean dessert plate. The marbled purple and green swirl will shine. Top each slice with a few candy eyeballs and a light dusting of edible glitter for that magical finish.
- Pair with simple accompaniments: fresh berries (raspberries, blackberries) or a dollop of whipped cream balances the richness and adds colour contrast. These are your best side dishes for desserts.
- If serving at a party, consider adding small spoons of berry coulis or chocolate drizzle on each plate so guests can customise. This turns the cheesecake into a centrepiece for your easy party food ideas.
- For a full dessert spread, you might serve this alongside a light fruit salad or sparkling water with citrus – keeping the rest of the menu simple so this bold cheesecake stands out.
- For casual family comfort food evenings, pair with a hot drink (coffee, cocoa) and let this cheesecake be the sweet finale after an easy dinner. It fits neatly into a relaxed home-cooked night.
Make Ahead + Storage Tips
- Make ahead: You can bake this cheesecake up to 24 hours in advance. After baking and cooling completely at room temperature, refrigerate it covered. Let it chill for at least 4 hours (overnight is best) before slicing. This makes it perfect for prepping ahead of a party or gathering.
- Storing leftovers: Once sliced, store in an airtight container in the refrigerator for up to 3-4 days. Cover the surface with plastic wrap or foil to avoid drying. This is part of your “leftover recipe hacks” so you don’t waste any slices.
- Freezing option: Yes, you can freeze cheesecake slices. Wrap each slice individually in plastic wrap and then place in a freezer-safe bag or container. Freeze for up to 1 month. Thaw in the fridge overnight before serving. This aligns with “best freezer meals” for dessert.
- Reheating / serving after chill: Before serving, bring the cheesecake out of the fridge about 10-15 minutes so it comes closer to room-temperature – this improves texture and flavour. Avoid leaving it out too long, especially if topped with candy eyes or delicate decorations.
- Prep-ahead strategies:
- Make the crust and press it into the pan the night before, keep covered in the fridge.
- Prepare and soften the cream cheese the day prior.
- Colour and swirl the batter shortly before baking.
- Bake, cool, and refrigerate until ready.
This means minimal “active cooking time” on the day of serving, making it ideal for busy families relying on meal prep ideas to stay ahead.
Cultural or Historical Notes
While the specific concept of a “witches’ brew swirl cheesecake” is more modern and playful than deeply traditional, it taps into broader trends in holiday dessert fusions and “party food” creativity. Cheesecake itself has a long history in American comfort food culture rich, indulgent, family-friendly. When you add colourful swirls and thematic decorations like candy eyeballs and edible glitter, you’re combining that classic comfort food into an event-ready dessert that plays into seasonal fun (like Halloween) and modern gatherings. Think of it as a modern twist on American dessert tradition: a comforting base with a whimsical, festive overlay.
Frequently Asked Questions (FAQ)
Can I make this cheesecake ahead of time?
Yes you can bake it and refrigerate for up to 24 hours before serving. Make sure it’s fully cooled and well chilled. This fits nicely into your healthy meal prep or dessert planning for gatherings.
What’s the best way to store leftovers?
Store any leftover slices in an airtight container in the fridge for up to 3-4 days. You can also freeze individual slices for up to 1 month, following the “best freezer meals” guidance.
Can I make this recipe healthier?
Absolutely. You can lower the sugar slightly, use light cream cheese (though texture will differ), or swap some ingredients for keto-friendly or dairy-free versions. These are healthy substitutions that still let you enjoy a beautiful dessert.
What substitutions can I use for allergies or dietary preferences?
For gluten-free: Use gluten-free cookie crumbs for the crust.
For dairy-free/vegan: Use vegan cream cheese, flax eggs, plant-based butter.
For low-carb: Use almond-flour crust, sugar alternative, full-fat dairy alternative.
These align with gluten-free recipes, low-carb dinner ideas (or in this case dessert ideas), and healthy recipe alternativ
Why did the centre of my cheesecake sink or crack?
Common causes: over-mixing the batter (introduces too much air), over-baking until centre is fully firm, or rapid cooling causing contraction. To avoid this, mix gently, bake until edges set and centre jiggles slightly, cool gradually, and refrigerate fully. These are core easy cooking tips for great cheesecake results.

Easy Halloween Cheesecake Recipe – Witches’ Brew Swirl Cheesecake
Ingredients
Method
- Preheat your oven to 325°F (160°C). Prepare a 9-inch springform pan by lightly greasing or lining the base with parchment paper.
- In a bowl, combine graham cracker crumbs and melted butter. Mix until the texture resembles wet sand. Press the mixture firmly into the bottom of the pan to form the crust. Set aside.
- In a large mixing bowl, beat softened cream cheese, sugar, and vanilla extract until smooth and creamy. Add eggs one at a time, mixing gently after each addition until fully incorporated.
- Divide the batter evenly into two bowls. Add purple food coloring to one bowl and green food coloring to the other, mixing each until the desired color is reached.
- Alternate spoonfuls of each colored batter over the crust, then gently swirl the colors together with a toothpick or skewer to create a marbled effect.
- Bake for 50–55 minutes, or until the edges are set and the center still jiggles slightly. Do not overbake.
- Allow the cheesecake to cool completely at room temperature, then refrigerate for at least 4 hours or overnight to set fully.
- Before serving, decorate the top with edible glitter and candy eyeballs for a fun, spooky Halloween touch. Slice with a warm knife for clean edges.