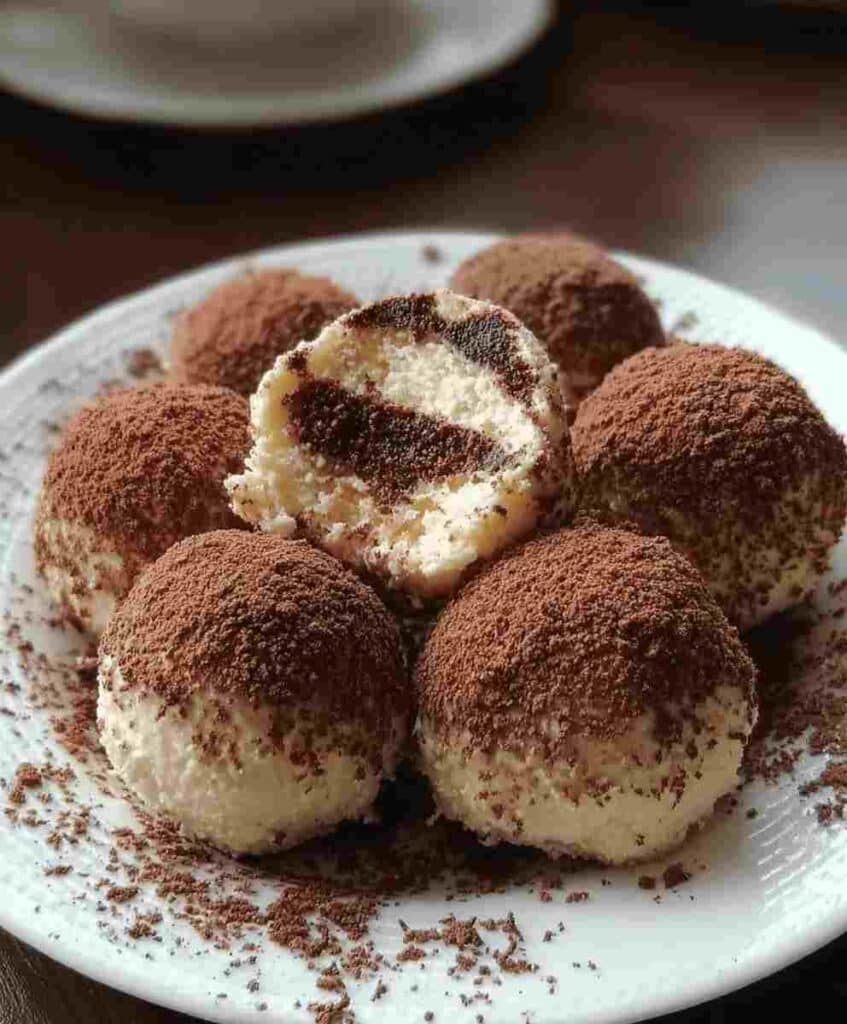
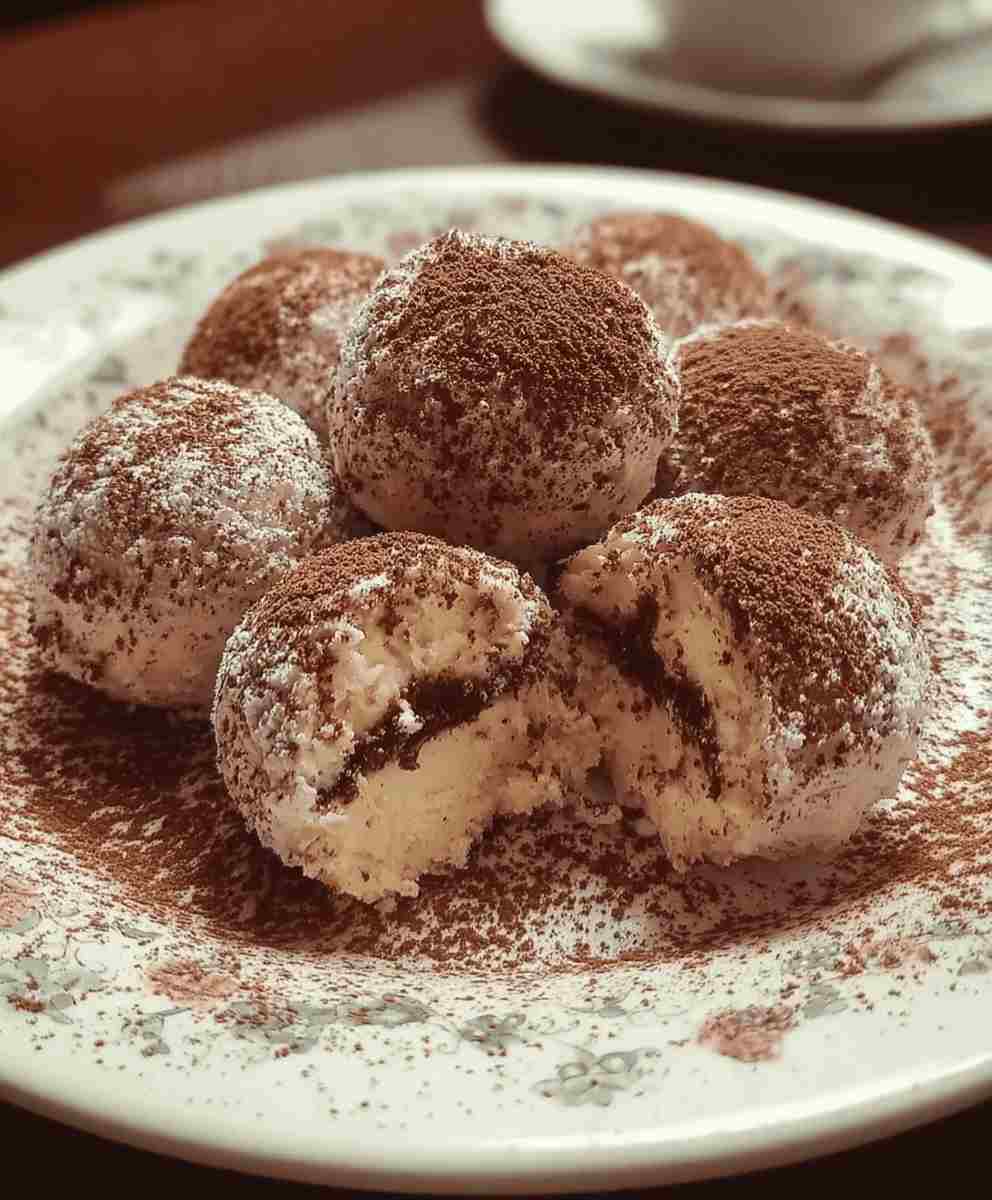
If you love tiramisu but don’t want the hassle of layering, baking, or long chilling times, these Tiramisu Balls are your dream come true. Creamy, rich, and infused with bold espresso flavor, this easy no-bake dessert recipe captures all the magic of classic tiramisu in bite-sized, mess-free form.
Each truffle-like ball delivers the perfect mix of textures: soft mascarpone, delicate ladyfinger crumbs, and a dusting of cocoa that melts in your mouth. With just a handful of ingredients and no oven required, you can whip up a batch of these indulgent Italian treats in under 10 minutes.
Perfect for party desserts, afternoon coffee breaks, or make-ahead treats, these 10-Minute Tiramisu Balls are elegant enough for entertaining yet simple enough for weekday indulgence. They’re proof that affordable, homemade desserts can be both sophisticated and effortless.
Why You’ll Love This Recipe
- No baking required: Just mix, roll, and chill ideal for hot days or busy schedules.
- Ready in 10 minutes: The ultimate quick dessert idea for when you need something impressive fast.
- Rich, creamy flavor: The perfect balance of mascarpone, espresso, and cocoa for authentic Italian taste.
- Elegant and versatile: Serve as party appetizers, after-dinner treats, or a sweet coffee pairing.
- Budget-friendly ingredients: Uses affordable pantry staples, making it one of the best low-cost dessert recipes.
- Make-ahead friendly: Chill them ahead of time and serve whenever you need a touch of indulgence.
Ingredient Breakdown
- Ladyfingers (200g): The base of classic tiramisu. When crushed, they create a light, airy texture that soaks up espresso beautifully, giving the signature coffee flavor we all love.
- Espresso (½ cup, brewed and cooled): Provides rich depth and that authentic Italian coffee essence. Use strong espresso for the most robust flavor perfect for coffee dessert lovers.
- Mascarpone Cheese (250g): The creamy heart of tiramisu. Its smooth texture and mild flavor create that luscious, melt-in-your-mouth consistency.
- Powdered Sugar (½ cup): Sweetens and stabilizes the mascarpone mixture, adding a silky finish to the dough.
- Cocoa Powder (1 tablespoon + extra for dusting): A dusting of cocoa balances the sweetness and gives each bite a hint of sophisticated bitterness.
- Coffee Liqueur (1 tablespoon, optional): Adds depth and warmth for a truly indulgent, adult-friendly dessert recipe. You can skip it for a non-alcoholic version.
- Vanilla Extract (1 teaspoon): Rounds out the flavors and enhances the creaminess of the mascarpone filling.
- Pinch of Salt: A small but crucial ingredient it sharpens the flavors and brings balance to the sweetness.
Pro Tips for Perfect Tiramisu Balls
- Use high-quality espresso: Strong, freshly brewed espresso delivers the best flavor. Instant coffee can work, but the richness of real espresso makes a difference.
- Don’t overmix the mascarpone: Stir gently to maintain its creamy, cloud-like texture. Overmixing can make it runny.
- Chill before serving: Even 30 minutes in the fridge helps firm up the texture and intensify the flavor.
- Sift your cocoa powder: For that flawless, professional dusting, sift cocoa before sprinkling it on top.
- Add texture: Roll your Tiramisu Balls in crushed nuts, chocolate shavings, or coconut flakes for visual appeal and crunch.
Ingredient Swaps or Variations
- Non-Alcoholic Version: Omit the coffee liqueur and use a splash of vanilla or almond extract for a family-friendly dessert.
- Vegan Tiramisu Balls: Substitute mascarpone with vegan cream cheese and plant-based butter, and use dairy-free cookies.
- Low-Sugar Option: Use a sugar substitute like erythritol or monk fruit sweetener for low-carb desserts.
- Chocolate Coated: Dip the chilled balls in melted dark chocolate for a rich, truffle-like finish.
- Nutty Twist: Add finely chopped hazelnuts or almonds for texture and a nutty aroma.
Serving Suggestions
- Coffee Pairing: Serve with espresso or cappuccino for the ultimate Italian café experience.
- Dessert Platter: Combine with truffles, chocolate-dipped strawberries, and biscotti for an elegant party dessert spread.
- Mini Dessert Cups: Place each Tiramisu Ball in a mini cupcake liner for classy, mess-free serving.
- Holiday Treat Box: Add to cookie tins or gift boxes for a thoughtful homemade gift idea.
- Layered Dessert Jar: Stack two or three Tiramisu Balls in a small mason jar, dust with cocoa, and top with whipped cream for a creative twist.
Make Ahead + Storage Tips
- Refrigerate: Store in an airtight container in the fridge for up to 4 days. The flavor actually improves after a few hours as the coffee and mascarpone blend.
- Freeze for Later: Freeze uncoated balls on a tray, then transfer to a sealed container. Thaw in the fridge overnight before serving and dust with cocoa powder just before serving.
- Best Served Chilled: While they can be enjoyed immediately, chilling enhances both the texture and flavor.
- On-the-Go Snack: Keep a batch in the freezer for an instant sweet pick-me-up anytime you crave something indulgent.
Cultural or Historical Notes
Tiramisu, which means “pick me up” in Italian, originated in the Veneto region in the 1960s. The dessert became famous for its layers of coffee-soaked ladyfingers, mascarpone cream, and cocoa dusting. These Tiramisu Balls take that beloved flavor profile and simplify it for the modern cook no layers, no baking, and no waiting overnight. It’s a modern twist on a traditional Italian dessert, honoring its heritage while embracing the speed and simplicity of today’s easy dessert recipes.
Frequently Asked Questions (FAQ)
1. Can I make Tiramisu Balls ahead of time?
Yes! These are the perfect make-ahead desserts. Chill them up to 4 days or freeze for several weeks for instant, ready-to-serve treats.
2. Can I make them without coffee?
Absolutely. Replace espresso with decaf coffee or hot chocolate for a caffeine-free version that’s still delicious.
3. How do I make these without alcohol?
Simply omit the coffee liqueur and add a bit more espresso or vanilla extract for flavor.
4. Can I use cream cheese instead of mascarpone?
Yes, though the flavor will be slightly tangier. For a smoother, more authentic taste, soften the cream cheese first.
5. How do I make them look professional?
Use a small cookie scoop for uniform shapes and roll them in sifted cocoa or chocolate shavings for a bakery-quality presentation.
10-Minute Tiramisu Balls
Ingredients
Method
- Step 1: Crush the ladyfingers in a food processor until fine crumbs form.
- Step 2: In a large mixing bowl, combine mascarpone cheese, powdered sugar, vanilla extract, and a pinch of salt. Mix until smooth and creamy.
- Step 3: Add cooled espresso and coffee liqueur (if using) to the mascarpone mixture and stir until well incorporated.
- Step 4: Gradually fold in the ladyfinger crumbs until the mixture becomes uniform and thick enough to roll.
- Step 5: Using your hands, shape the mixture into small balls about the size of a walnut.
- Step 6: Place the balls on a parchment-lined tray and dust lightly with cocoa powder.
- Step 7: Chill in the refrigerator for at least 30 minutes to set, or serve immediately for a softer texture.