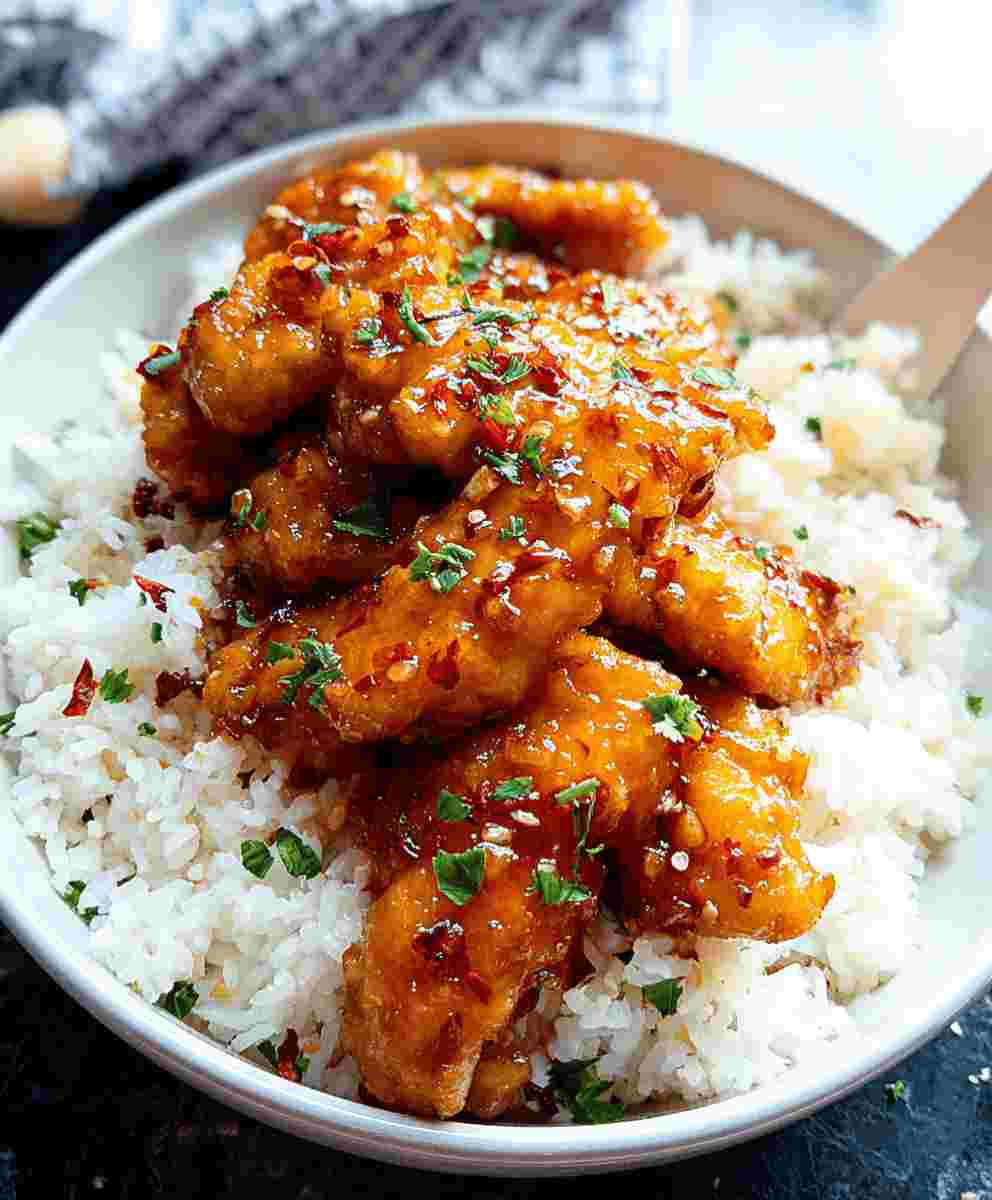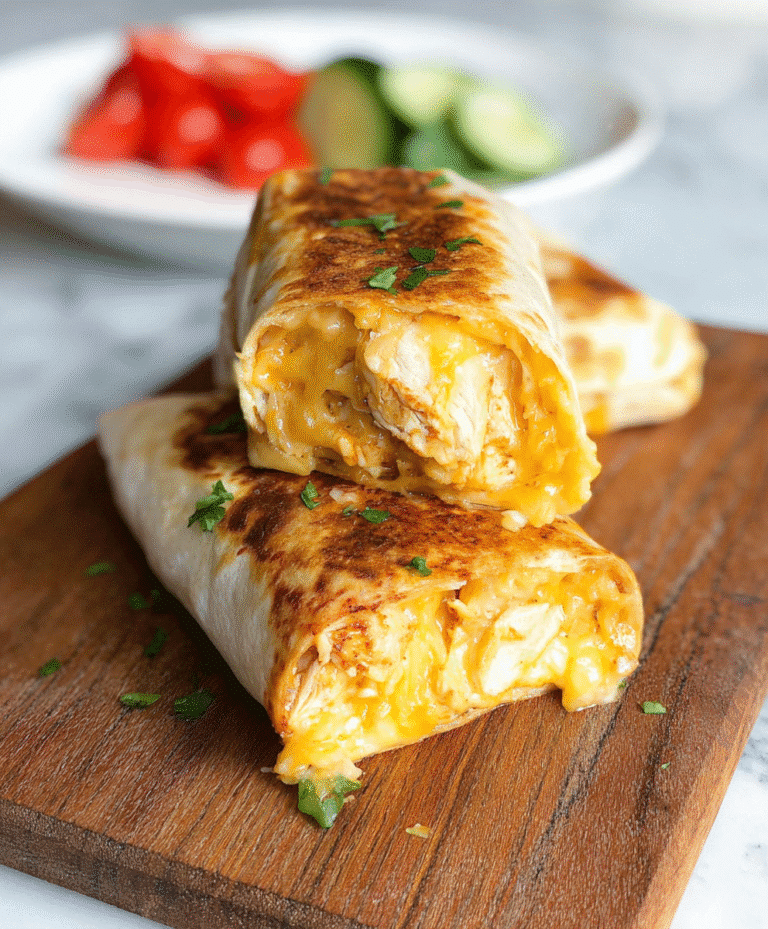
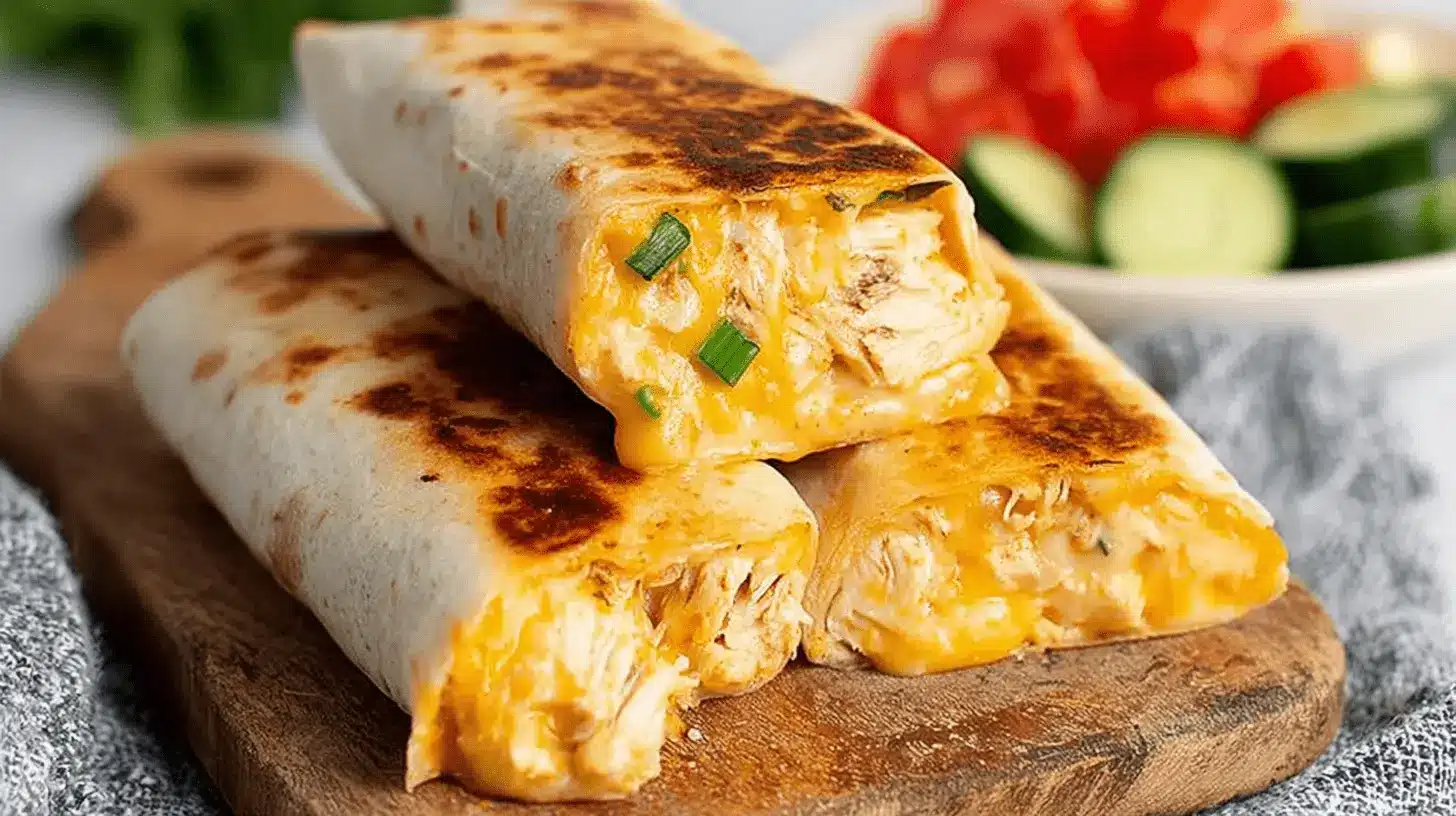
Get ready to discover the ultimate comfort food experience with these incredible Cheesy Garlic Chicken Wraps. Imagine a crispy outside, giving way to a warm, gooey, and cheesy interior packed with savory garlic chicken. This recipe offers a simple, high-protein, and incredibly satisfying meal, perfect for a quick lunch or a delightful family dinner. You’ll love how easy it is to bring these flavorful wraps to your table!
Why You’ll Love These Cheesy Garlic Chicken Wraps
These Cheesy Garlic Chicken Wraps are designed with simplicity and flavor in mind, making them a fantastic choice for any home cook.
- Quick to Prepare and Cook: You can have a delicious meal ready in under 20 minutes from start to finish.
- Packed with Irresistible Flavor: The combination of garlic, cheese, and a hint of spice creates a truly addictive taste.
- Highly Customizable: Easily adjust ingredients to suit your family’s preferences or what you have on hand.
- Excellent for Meal Prepping: Prepare the chicken filling ahead of time for even faster assembly later.
- Satisfying and High in Protein: These wraps keep you full and energized, thanks to a generous amount of chicken.
- Kid-Friendly and Adult-Approved: A crowd-pleaser that everyone at the table will enjoy.
Ingredients
To make these delightful Cheesy Garlic Chicken Wraps, gather these simple ingredients. The quality of your ingredients truly makes a difference in the final taste of these flavorful wraps.
- 2 large tortillas (regular or low-carb/high-protein)
- 7 oz cooked chicken (about 200 grams, chopped; rotisserie chicken works great!)
- 2 garlic cloves, minced or grated (adjust to taste)
- 2 tablespoons light mayonnaise
- 1 tablespoon light Greek yogurt (or plain yogurt)
- 2 teaspoons hot sauce (like Frank’s)
- ¼ teaspoon salt
- 3 oz grated cheese (about 90 grams; I used a cheddar blend)
- 1 green onion, chopped
- Olive oil spray
Notes & Substitutions
- Tortillas: Choose large, flexible tortillas like flour tortillas. For lower carb options, try whole wheat or almond flour wraps.
- Chicken: Cooked and shredded chicken breast or thigh works perfectly. A store-bought rotisserie chicken is a fantastic time-saver.
- Garlic: Freshly minced garlic provides the best flavor. If using garlic powder, start with ½ teaspoon and adjust.
- Creamy Base: If you don’t have light mayonnaise and Greek yogurt, you can use all mayo or all plain yogurt for a different texture. Sour cream is another good alternative.
- Hot Sauce: Adjust the amount of hot sauce to your preference for heat. Sriracha or a milder buffalo sauce are good options.
- Cheese: Cheddar, Monterey Jack, or a Mexican blend melt beautifully. Research on the science of melting cheese highlights how factors like calcium content and protein structure affect meltability. Use your favorite melty cheese!
- Green Onion: Chives or a tiny bit of finely minced red onion can substitute for green onion.
- Optional Add-ins: Get creative! Try adding diced avocado, sun-dried tomatoes, black olives, fresh spinach, sautéed mushrooms, or thinly sliced bell peppers to the filling.
Equipment
You only need a few basic kitchen items to create these amazing Cheesy Garlic Chicken Wraps. These tools are common and easy to find, making this recipe accessible for everyone.
- Medium mixing bowl
- Spatula or spoon
- Non-stick pan
- Lid for the pan
- Sharp knife
- Cutting board
Instructions
Follow these clear, numbered steps to create your perfect Cheesy Garlic Chicken Wraps. Each action is precise, ensuring a delicious result every time.
- Prepare Chicken Filling: In a medium bowl, combine the chopped cooked chicken, minced garlic, light mayonnaise, light Greek yogurt, hot sauce, and salt. Mix everything together thoroughly until the chicken is evenly coated.
- Assemble the Wrap Base: Lay one large tortilla flat on your clean work surface. Sprinkle about 2 tablespoons of grated cheese onto the lower third of the tortilla, leaving a small border at the bottom.
- Add Chicken Mixture: Spoon about ⅔ cup of the prepared chicken mixture over the layer of cheese on the tortilla. Spread it out evenly.
- Layer More Flavor: Add another tablespoon of grated cheese directly on top of the chicken mixture. Sprinkle a generous amount of chopped green onion over the cheese.
- Fold and Roll Tightly: Carefully fold in the sides of the tortilla over the filling. Then, starting from the bottom, roll the tortilla up tightly and securely. Make sure the filling stays tucked inside.
- Pan-Fry to Perfection: Heat a non-stick pan over medium-high heat. Spray the pan lightly with olive oil spray. Place the assembled wrap into the hot pan, seam-side down.
- Cook Until Golden: Cook the wrap for 3–4 minutes on the first side until it’s golden brown and crispy. Flip the wrap over and cook for another 3–4 minutes on the second side.
- Cover to Melt & Heat: Once both sides are golden, place a lid over the pan for the last minute of cooking. This traps the heat, helping the cheese inside fully melt and ensuring the filling is warmed through.
- Slice and Serve Immediately: Carefully remove the crispy wrap from the pan. Place it on a cutting board, slice it in half diagonally, and serve these amazing Cheesy Garlic Chicken Wraps right away for the best experience.

Pro Tips & Troubleshooting
Achieve perfect Cheesy Garlic Chicken Wraps every time with these helpful tips and avoid common pitfalls.
- Optimal Melting: Covering the pan with a lid during the last minute of cooking is crucial. The trapped steam creates a warm environment, ensuring the cheese inside melts beautifully and the filling heats through.
- Crispy Texture: Don’t overcrowd the pan. Cook one or two wraps at a time to ensure even heat distribution. Use medium-high heat for that desirable golden-brown and crispy exterior.
- Prevent Soggy Wraps: Avoid overfilling your tortillas, as this makes them difficult to roll and more prone to bursting. Make sure your cooked chicken filling isn’t overly wet.
Common Mistakes
- Overfilling wraps: This leads to breakage when rolling or cooking. Use the recommended amount of filling.
- Not enough heat: A pan that isn’t hot enough won’t give you a crispy exterior, resulting in a soft wrap.
- Forgetting to cover the pan: Without a lid, the cheese inside might not melt fully, and the center might remain cool.
Serving, Storage, & Variations
These Cheesy Garlic Chicken Wraps are incredibly versatile, perfect for various meals and easy to store.
Serving Suggestions
Serve your crispy wraps with a fresh green salad, a side of roasted vegetables, or a small bowl of pickles for a tangy contrast. They also pair wonderfully with salsa, guacamole, or a handful of your favorite chips.
Make Ahead
You can prepare the chicken filling up to 2-3 days in advance. Store it in an airtight container in the refrigerator. This makes assembling the wraps super quick when you’re ready to cook.
Storage
Store any leftover cooked wraps in an airtight container in the refrigerator for up to 2-3 days. Reheat them in a pan over medium heat for a few minutes per side until crispy again, or in a toaster oven for best results.
Freezing
The chicken filling can be frozen in an airtight container for up to 1 month. Thaw it in the refrigerator overnight before assembling the wraps. Avoid freezing the assembled or cooked wraps, as the tortillas can become soggy upon thawing.
Flavor Variations
- Spicy Kick: Amp up the heat by increasing the amount of hot sauce or adding a pinch of red pepper flakes to the chicken mixture.
- Herbaceous Notes: Stir in some fresh chopped cilantro, parsley, or chives into the chicken filling for an aromatic boost.
- Tangy Twist: A squeeze of fresh lime juice over the filling before rolling can add a bright, zesty flavor.
- Vegetarian Option: Swap the chicken for cooked black beans, chickpeas, or a firm tofu scramble to make a delicious vegetarian wrap.
- Breakfast/Brunch Idea: Add some scrambled eggs to the chicken mixture before wrapping for a satisfying breakfast version.
Nutrition
Here’s a breakdown of the nutritional values for one serving of these tasty Cheesy Garlic Chicken Wraps, helping you fit them into your dietary needs. Each wrap offers a substantial amount of protein, making it a truly satisfying meal.
| Nutrient | Amount |
|---|---|
| Calories | 476 kcal |
| Carbohydrates | 19 g |
| Protein | 38 g |
| Fat | 27 g |
| Saturated Fat | 11 g |
| Polyunsaturated Fat | 5 g |
| Monounsaturated Fat | 7 g |
| Trans Fat | 0.01 g |
| Cholesterol | 120 mg |
| Sodium | 1090 mg |
| Potassium | 347 mg |
| Fiber | 1 g |
| Sugar | 2 g |
| Vitamin A | 543 IU |
| Vitamin C | 5 mg |
| Calcium | 376 mg |
| Iron | 3 mg |
Crispy Cheesy Garlic Chicken Wraps
Ingredients
Equipment
Method
- In a bowl, combine chopped chicken, minced garlic, mayonnaise, yogurt, hot sauce, and salt.
- On the lower third of a tortilla, layer cheese, the chicken mixture, more cheese, and chopped green onion.
- Fold in the sides of the tortilla, then tightly roll it up from the bottom to form a wrap.
- Heat a non-stick pan over medium-high heat and spray it with olive oil.
- Place the wrap seam-side down in the pan and cook each side for 3-4 minutes until crispy and golden, covering with a lid to heat through.
- Slice the cooked wraps in half and serve immediately.
Notes
FAQ
Got questions about these delicious Cheesy Garlic Chicken Wraps? Here are some quick answers.
Can I bake these wraps instead of pan-frying?
Yes, you can! Bake them at 400°F (200°C) for 10-15 minutes, flipping halfway, until golden and crispy.
Can I use raw chicken for this recipe?
No, you need to use pre-cooked chicken. Cook chicken breast or thigh fully before chopping and mixing it into the filling.
How can I make these wraps less spicy?
Simply reduce or omit the hot sauce from the chicken mixture. You can also use a milder salsa instead.
Conclusion
These Cheesy Garlic Chicken Wraps offer an unbeatable combination of quick preparation, incredible flavor, and satisfying texture. They are perfect for busy weeknights, a fun lunch, or a customizable meal for the whole family. Sweet Emily’s mission is all about making baking simple for busy parents and beginners, and this recipe delivers on that promise. Give this recipe a try and experience the joy of a truly delicious and easy-to-make meal. Don’t forget to share your creations and let us know what you think of these amazing Cheesy Garlic Chicken Wraps!